
YiffIndex Help

For most of the buttons and stuff in YiffIndex, there are tooltips to help you out.
Please click on one of the colored fields above to get specific help about it. The colors do not have a special meaning.
Search images

This button opens the search window, one of the most important parts of YiffIndex:
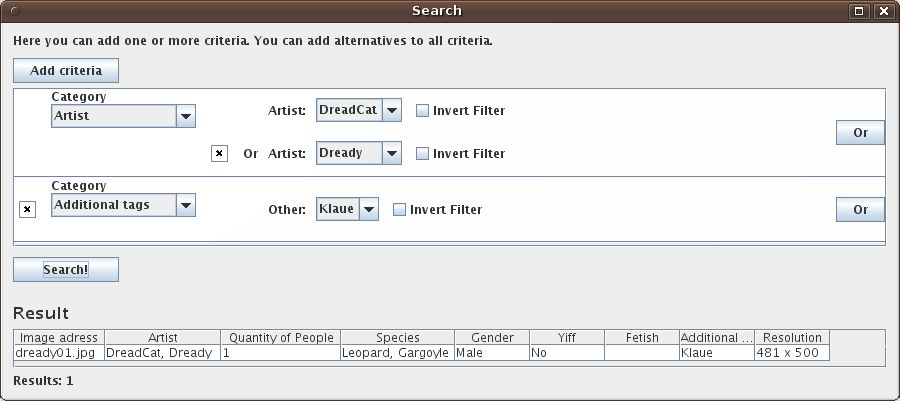
The search works by defining multiple search "words". Those can be added using the button "Add criteria". Criterias are bundled to the fields of Yiffindex, from A as in "Additional Tags" to Y as in "Yiff".
The field "Species" is somewhat special: "Generic X" stands for all members of the animal family X, not just for images that have species defined as "Generic X". In other words, a search for "Generic cat" returns images with the species cheetah, lion, leopard, tiger etc.
The field "Free text" searches through everything YiffIndex knows about an image, from the file name to the Resolution. The downside is that it's slower than the other search fields.
Most of the criterias allow you to invert their effect. For example, while the criteria "Artist" with the artist Dready turns up all images by Dready, the same criteria with "Invert Filter" will turn up all images that were NOT made by Dready.
It's also possible to add alternatives to criterias, which form an OR-relationship to them, using the "Or"-button. In the screenshot above this was done with the criteria "Artist". It means that it would, diregarding the second criteria, turn up all images by Dready, all images by DreadCat and all images by both of them (Dready OR DreadCat) (just ignore the fact that Dready and DreadCat are the same person in this example).
If you add more than one criteria, they all have an AND-relationshit. Taking above screenshot again, this time with all criterias, that means that it searches for all images from Dready or DreadCat, but only those of them that have also "Klaue" as their additional tag ([Dready OR DreadCat] AND Klaue). You can also chain the same criteria multiple times this way. Let's say you wanted to search only for collaborations of two artists but not the pictures they worked on alone, then you would put the artist criteria there twice without using the above described "Or"-button.
In short: For multiple criteria, all of them have to apply, for a criteria with alternatives, only one or more, but not all, have to apply.
Criterias and alternatives can be removed using the "X"-button.
The results of the search are displayed in the lower part of the window. They can be sorted using the column headers. For a preview of a particular result, just hover the mouse over it, while a double click will open it in full size, or, if it's larger than your resolution, in the highest possible size (you can ESCape this view again).
Additional functions can be accessed using the trusty right mouse button. Possible actions are:
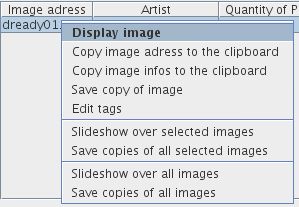
- "Display Image" does the same thing as a double click.
- "Copy image adress to the clipboard" does just that, usefull for Open-Dialogs in other programs.
- "Copy image infos to the clipboard" copies all tags of the image to the clipboard, which looks like this:
Image adress = /home/klaue/[...]/dready01.jpg
Artist = DreadCat, Dready
Quantity of People = 1
Species = Leopard, Gargoyle
Gender = Male
Yiff = No
Additional tags = Klaue
Resolution = 481 x 500
- "Save copy of image" lets you save a copy of the image to a place of your liking.
- "Edit Tags" lets you change the tags for this image right there, which is useful for corrections. You have to re-run the search after changing something to see the change in the result window.
- "Slideshow over all/selected images" starts a slideshow (well, duh) with an interval of 4 seconds between the images. You can skipthe wait using the mouse button. You can also skip or return to the previous image with the cursor keys. End it with ESC. With "over all images", all search results are used. With "selected images", only those selected by the usual means (using the Shift or CTRL keys with the mouse).
- "Save copies of all/selected images" saves copies of all or the slected images in a directory. Should an image with the same name allready exist in there, a number is added (For example: You want to save a.jpg in a directory where an a.jpg allready exists, so the image will be saved as a[1].jpg).
Export database to file

Using this button, you can export the whole internal database, which means, all image data in the program, to a file. This file can later be imported again with the import button.
Such an export makes for example sense for a backup or for transfering the data to another computer.
Exports do not contain image paths, which means that the import still works if those changed through a rename or file move between export and import.
Import database from file

Using this button, you can import a file which was previously exported. Because the exported file contains no file paths, the to-be-imported images are checked against the images in the selected directories using MD5-Hashes. This can take some time, especially if you have lots of images.
Upload own index to server

A click on this button loads your image data up to the server. You'll be asked if you want to upload all images or only the actual one - if there is no actual one, "actual image" obviously does nothing.
Image data that was sent to the server helps all users of YiffIndex, so make sure you send plenty of it ;)
Included in the upload is a version check, so if you want to know if you use the actual version of YiffIndex, upload some images. The warm and fuzzy feeling of helping other people is included for free.
Update Index with data from server

A click on this button searches the server for image data which corresponds to your images to automatically tag them.You'll be asked if you want to download all images or only the actual one - if there is no actual one, "actual image" obviously does nothing. If you choose all images, you'll be asked if you want to replace existing ones. That means, if an allready indexed image of yours is found on the server, it will overwrite all old tags with the new data. Because the data on the server could sometimes be less complete than your own for an image, uploading beforehand might not be the worst idea.
The download function consists of several parts: First, all your images are hashed (MD5), then they're uploaded and if the server has them, the data from the server is read. Especially the first part of that can take quite long, depending on the number of images you have.
Included in the upload is a version check.
Plugin

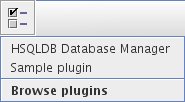
A click on the plugin button opens a menu with all activated plugins (if any) and the plugin browser:
I cannot say anything about the plugins because they will come from other developers.
A click on "Browse plugins" opens the plugin browser:
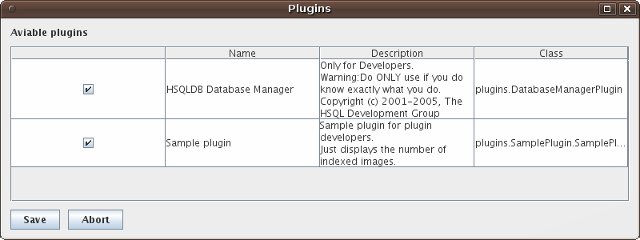
You can activate plugins by clicking on the checkboxes. After activating and saving, the choosen plugins will appear in the above-displayed plugin menu.
The plugins included in YiffIndex are not meant for normal users but for plugin developers.
Installing plugins:
To install a plugin, just put its class file(s) in the plugins directory (note: not allrounder/plugin). For some plugins you'd have to also put a subdirectory in the plugins directory, for more informations you have to ask the developer of that specific plugin.
Developing plugins:
Developing plugins for YiffIndex is relatively simple if you know Java. The plugin just has to be in the plugin directory (and therefore package) and implement the YiffIndexPlugin interface. Whoever wants to try and write a plugin should take a look at the source of the sample plugin where you can find all information you need.
Reorganize Database (Clean it up)

The database reorganization cleans up the database. This should be done in a regular interval. It removes image data from images that do not exist anymore and repairs path bindings for files that were moved and/or renamed.
The reorganization goes through the following phases:
- Firstly, the reorganization checks if there is "lost" image data. Such lost data is image data that that points to images which do not exist anymore, for example because the original image was renamed, moved or deleted. Images in directories that were marked as "Removable media" in the directory chooser are omitted. If no such lost image data is found, the process stops.
- Secondly, it tries to recreate the image data found in the first step. It compares all this data with all images in your directories for the case that the original image is still there and was just renamed or moved. If all data can be recreated this way, the process stops.
- Thirdly, all imagedata that could not be recreated is removed from the database. Before they are deleted, you get the chance to export the data in a file. This is the same method as in the normal export, just that not all images are exportet, just the to-be-deleted ones.
Info/Help

A click on this button opens the info dialog with general infos about YiffIndex, like the version. It also grants access to this help here.
File list
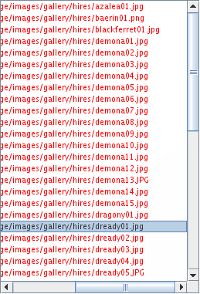
This is the file list. It contains all images in the selected directories. An image can be selected with a click.
Partly or fully indexed images are black, not indexed ones red. To change the displayed images, you can use the filter.
File list filter
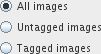
This is the filter for the file list. It can be used to only display indexed ot not-indexed images instead of all.
The filter settings also affekt the buttons for the previous and the next image.
Choose the directories which conatin your images

This button opens the directory chooser:
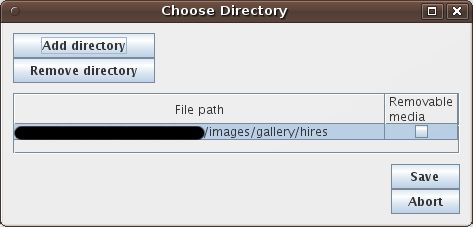
Here you can choose the directories which contain the images that show up in YiffIndex.
A click on "Add directory" adds a directory. If that directory contains subdirectories, you'll be asked if you wanted to add them too. Every directory and subdirectory will show up and can be removed again with the appropriate button.
Should one of the to be removed directories contain one or more indexed images, you'd be asked if you want to try to recreate the lost image data with the images in the other directories (Basically the same thing as the database reorganization). If you decline or it was not successfull, you can export the otherwise lost image data. It's the same as the normal export, just that only the lost images would be exported.
The check box "Removable media" is for images on any media that is not always connected to the computer, such as CDs, DVDs, external hard disks and so on. Images inside those directories will be exempted from the database reorganization because the medium could be not connected to the computer when it runs.
The number of people/creatures

This is for the number of people/creatures in the pic. If the same person/creature is multiple times in the pic, for example in comics, it counts as only one.
Choose the Species
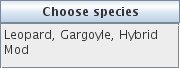
Using the species chooser, you can list all the species of the creatures in the image. A click on the button opens the following dialog:
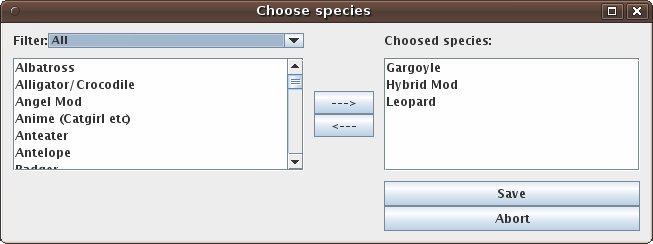
The filter at the top can be used to only display particular species families (for example the cat family, felidae). Fitting species can be added using the "--->"-button.
If you're unsure about the species, you can also just set the family by choosing, for example, "Generic cat" for all cat-like creatures. If the family of the animal is not listed or if the animal is fictional, use "Other". If you can not guess which animal it's supposed to display, don't chose anything.
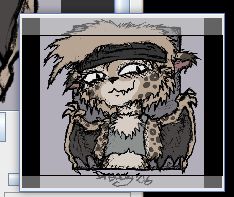
Special case Modifiers:
The members of the family "Modifier" are not species themselfes but meant to modify other species. The LeoGarg (Screenshot) is, for example, "Leopard", "Hybrid Mod" and "Gargoyle". Short descriptions of the modifications are aviable with tool tips.
The names of the artists

This is the place to enter the artist that drew the image.
If the artist has multiple nicknames, all of them can be added, sepparated by a comma, like it was done above with "Dready" and "DreadCat". When in doupt, use the Furaffinity username.
If the image was a collaboration of multiple artists (for example if one drew the lineart and another colored it), all of them are, again sepparated by commas, to be added.
Allready known artists are shown as recommendations while typing:

Those can be selected by the cursor keys and selected by enter. This is perferable to the typing to avoid having the same artist multiple times (through typos like "Dreadi" instead of "Dready" or sloppyness like "dready" instead of "Dready") in the program.
Genders which occur in the image
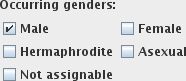
Here you can select the gender of the character in the image. Should there be multiple characters, you just select all of their genders.
Male and female should be clear.
Hermaphrodite is not just for "real" herms, but for "cuntboys" and "Dickgirls" too. The term "hermaphrodite" was choosen over "intersexuals" because it's more widely known - if you're a real intersexual, please don't be offended.
Asexual is for characters that don't belong to any gender, it doesn't mean the sexual preference. Asexual characters are those who are drawn in a way that makes the gender ambiguous and who have no back story that makes the gender clear. An example would be the aliens, but not their queen, from the Movie with the same name.
Not assignable is for characters who clearly belong to a gender, you just can't tell it from the image because they are, for example, only seen from behind or are partly obfuscated by something.
Additional tags
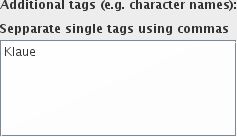
This field is for additional informations. Mainly for stuff like the character name(s), the title of the comic, if it belongs to one, the title of the the movie or the series, if it's fanart of one (only if there are original characters in the pic) and so on. Please use the english name of the movie/series if it's fanart.
Allready known tags are shown as recommendations while typing:
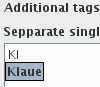
Those can be selected by the cursor keys and selected by enter. This is perferable to the typing to avoid having the same tag/characters multiple times (through typos like "Klaus" instead of "Klaue" or sloppyness like "klaue" instead of "Klaue") in the program.
Please do not use this field for an image title, if one even exists, because that would fill the database with useless crap with one entry per image. The reason of the tags is to make the search more easy, not to increase the size of the database.
Yiff
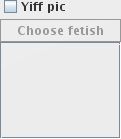
This field is for everything us adults love so much. If you are not 18 yet, shame on you :)
An image counts as yiff inside the program if it contains nudeness. That also includes some stuff that's usually called "tasteful nude". Rule of thumb to have a clear border: If you can see nipples, primary sex organs or a naked unobscured butt, it's yiff (at least here).
A click on the Yiff checkbox grants you access to the fetish menu. This menu is optional, for example, just nudeness usually contains no fetishes. Please note that the menu contains not only "real" fetishes, but also, to make searching pics easier, sexual practices like oral sex.
A click on the "Choose fetish" button opens the following dialog::
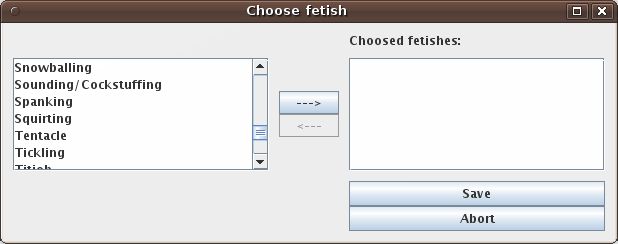
Here you can add one or more fetishes using the "--->"-button. For some more unusual fetishes, there's a tool tip with a short explanation, just hover the mouse over it for 1-2 seconds.
For fetishes that are not in the list, choose "Other" at the bottom of it..
Display image in original size

Displays the image in it's real size. If the image is small enough to fit the image frame in it's original size, the button does nothing.
Display image in optimal size

Displays the image in a size large enough to just fit in the image frame, but not larger. If the image is small enough to fit in it's original size, the button does nothing.
Previous Image

Displays the previous pic in the actual file list.
Next Image

Displays the next pic in the actual file list.
Image Dragger

This nice button lets you comfortably scroll the image.
A known bug in Linux is that the scrolling has no effect if the mouse is outside the main window when releasing the mouse button. This is a bug of the Java Virtual Machine and can not be fixed by the programmer, sorry.